 Smart-Hint

目次
いきなり実践から始めよ

さて、前回はPython(Google Colaboratory)のノートブックの使い方についてご紹介しました
今回はExcelのデータを読み取って、Pythonで操作する方法をご説明していきます

さっそく実践ができるんですね!

Pythonに関する本を見ると、基礎から説明しているものを多く見かけるけど
初心者は利用イメージが湧かないため挫折してしまう・・・

実は本屋で立ち読みしたんですが、難しくてそっと閉じました・・・

Pythonが分かる人向けに「分かりにくく」書かれている本がほんとに多い・・・

独学でやろうとしたらすぐ挫折していました・・・

なので実際のデータで実践していくことで、Pythonを使うイメージを持ってもらいます
実践しているうちに、やりたいことができない場面が訪れるはずなので
その時に基礎を学べばよいと思っています!
スポーツでも、まずは試合に出て楽しさを実感してから、基礎練習をやるのに似ていますね!
その通り!だから実際のデータを使ってPythonを学んでいきましょう
Excelを読み取る
さっそくExcelのデータを読み取ってみましょう!
まずはサンプルのデータをダウンロードしてください!

ダウンロードできました!
もちろんお手元のExcelデータでも大丈夫ですよ!
持っているExcelデータもあとで試してみます!

まずはExcelをGoogle Driveのどこかのフォルダに入れて、Google Colaboratoryとの連携をします
そこからは記事の通りに進めてください
 【Python】Google ColaboratoryとGoogle Driveを連携する方法
連携までできました!そこからどうすればよいですか??
ExcelをPythonで読み取るにはread_excelを使います
Google Driveのパスを()括弧の中に記載しましょう
※パスの場所が違うと思うので***の部分を変えてください!
pd.read_excel('/content/drive/MyDrive/***/student.xlsx')あれ!?コードをコピーして実行しても、エラーが出てしまいました!?
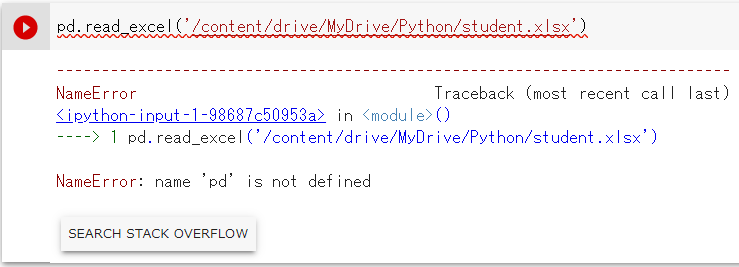
あ、しまった。Pandasをインポートするの忘れていました
パンダス?パンダのことですか??
read_excelの機能が入っているライブラリをPandasと呼びます
Pythonでは1から関数や仕組みを作る必要はなく、あらかじめ用意されている機能を使うことができます!
ライブラリ?いまいちまだ理解できていません・・・
例えば「スマホ」を使うときに、「アプリ」をダウンロードしますよね?
それに似ていて、やりたいことに応じて「ライブラリ」をインポートします!
なるほど、それはイメージできます!
「スマホ」にデフォルトの機能があるように、「Python」だけでも単純な計算やデータを扱うことができます
一方でライブラリをインポートすることで、より高度な分析やキレイなグラフを作ることが可能です!
今回はPandasというライブラリ(アプリ?)をインポートするんですね!
そもそもPandasは何ができるんですか?
Pandasはデータ分析ができるライブラリです!
利用するためには下記コードを書くだけでOK
import pandas as pd細かいところなんですが、pdって何ですか?
Pandasの略がpdで慣例としてこのように使うことが多いです
頭に付けて機能を使っていきます!
だからpd.read_excelとなっていたんですね!
これで改めて実行します!
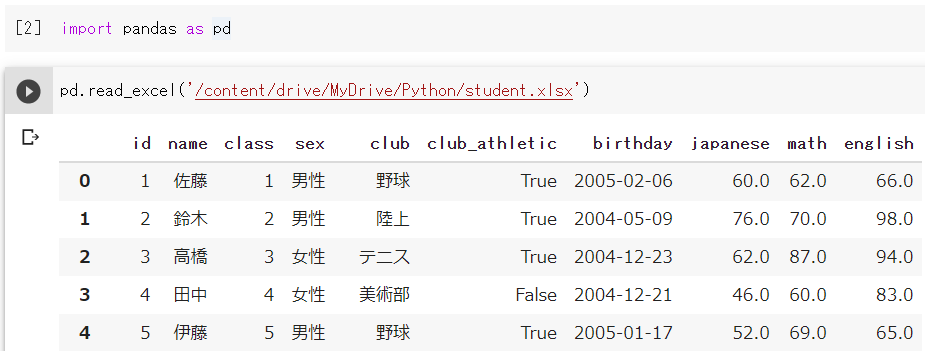

うまくデータが出ましたー!!!!
簡単にExcelのデータをPythonで読み取ることができましたね!
思ったより簡単でした!もっと複雑にコードを書くのかと思いました・・・
Jupyter Notebookを使っている方で、Pythonが同じパスに入っているときはファイル名だけでも大丈夫です!
pd.read_excel('student.xlsx')変数を使いこなす!
よーし!さっそくデータ分析していくぞー!
いいね!データの表を見て、分析のイメージができてきたのかな
ただその前に非常に重要な「変数」を覚えて欲しい!
へんすう?? おかしな数字ってことですか?
全然違う・・・
「変数」とは簡単に言うと「名前が付いている箱」です!
箱?プログラミングで箱を使うんですか??
そう、箱に入れておくことで「追加」や「変更」が自由にできるんだ
また繰り返し使うときも楽に書ける!
うーん、分かるような、分からないような・・・
ルールさえ守れば非常に便利な機能だから覚えて欲しい
- 変数名は自由につけてOK(Pythonのデフォルト機能と被っているものはNG)
- 変数名(名前の付いた箱)を左に、=イコールを挟んで、入れたい内容を右に書く
=イコールを書くので「同じ」という意味に思ってしまいますが、変数という箱に代入するイメージです
変数の中に入れる!ですね!
「a」と「b」という名前の付いた箱(変数)に、数字を入れてみましょう
では「a」には10を、「b」には20を入れてみました!
これで合ってますか?
a = 10
b = 20
合ってます!それでは「a」+「b」をやってみましょう
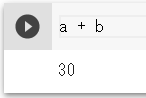
お、あれ。30が出てきた・・・
「a」の箱(変数)には10が入っていて、「b」には20が入っていました
足せば30になりますよね!
まあ、当たり前な気もしますが・・・
ちなみに下記のようなコードを書くと、自分自身の変数も更新することができます
a = a + bこれだと「a」が10から30になるんですかね!?
そのとおり!変数のイメージはできてきましたね!
Excelデータも変数に入れる!?
実は先ほどのExcelで読み取ったデータも変数に入れることができます!
表も変数に入れられるんですか??
そう、データ分析は変数をどんどん作っていって進めていきます!
どんなふうに箱に入れるんですか?
全く同じですよ!
これもPythonの慣例ですが「df」という変数を使っていきます
df = pd.read_excel('/content/drive/MyDrive/***/student.xlsx')「df」にデータを入れることができました
でも表がでません・・・
上のコードでは変数にread_excelの情報を入れているだけなので、特に結果が出力されません
変数「df」に対して、始めの5行を出力するheadを使ってみましょう
※.ピリオドを忘れずに
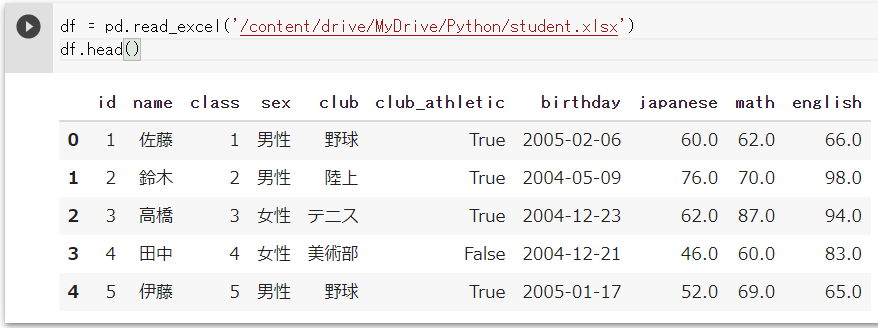
やった、データが出ました!
この変数をまた別の変数に入れたりして、データの追加や集計を行っていきます
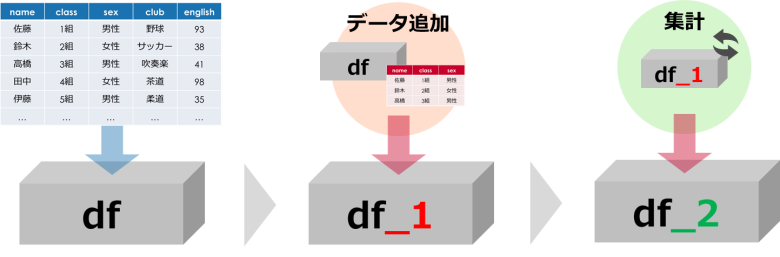
流れはイメージできました!
今回はここまでにしましょう!次からテストのデータをいじっていきますよ!
read_excelについての細かい説明は記事をご覧ください!
 【Python】read_excel|エクセルをPythonに読み込む方法
まとめ
- read_excelでExcelデータを読み取ることができる
- 変数は名前の付いた箱
- 読み取ったExcelのデータも変数に入れることができる
 週末Pythonゆる講座 #4|まずは平均から!